A Dutch braid is a special kind of three-strand braid where each side piece is woven under the middle strand (the opposite of a French braid). It’s sometimes called an “inside-out braid” because it makes the braid sit on top of the head. This gives the braid a raised, 3D look. Dutch braids look neat on long or short hair, and with practice they can be done in about 5–10 minutes. The step-by-step instructions below are written in simple language so that parents helping their child (or teens doing it themselves) can follow along easily. Don’t worry if it feels tricky at first – it gets easier with practice.
A finished Dutch braid stands out on the head. Notice how each section is woven under, giving a raised braid (shown here).
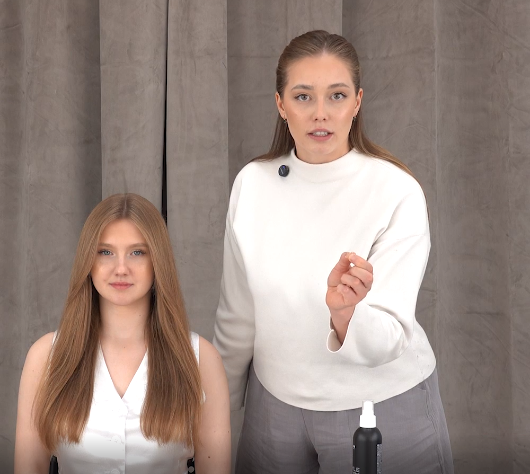
Before You Start
-
Gather your tools. You need little more than hair, a mirror, and both hands. A comb or brush to detangle the hair, and hair elastics (clear or the hair color) to tie off the braid are helpful. You may also want water or a light styling spray/serum to smooth frizz.
-
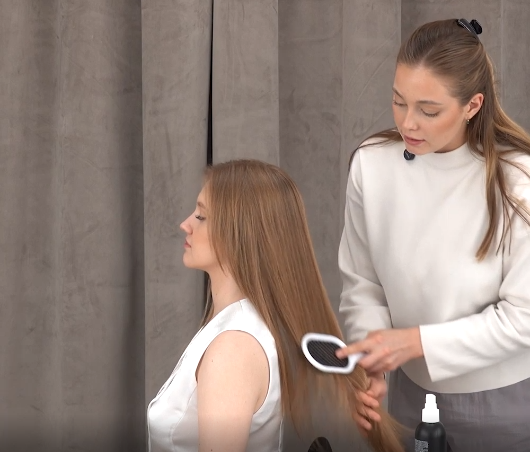
Prep the hair. Brush or comb out any knots first. Damp or slightly damp hair can be easier to manage. A quick spritz of water or a smoothing product on the top of the head will tame flyaways and make the sections easier to grab.
-
Position for comfort. If you’re braiding someone else’s hair (like a child), have them sit or stand comfortably. If you’re braiding your own hair, you may need two mirrors or a selfie camera to see the back of your head.
Step-by-Step Guide
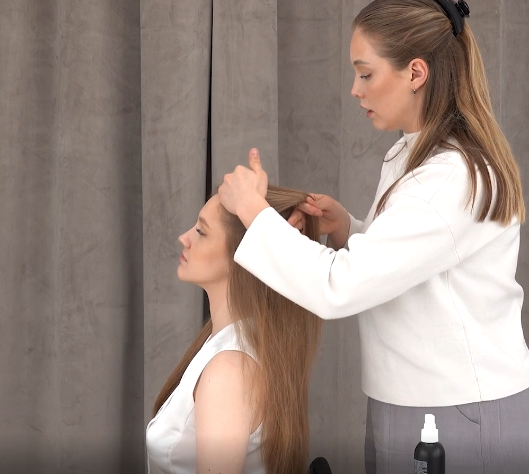
Hands shown braiding hair in progress. Start by dividing the hair and taking the first crossings under the center strand.
-
Section the hair. Divide the hair where you want the braid to start. For a single braid, you might gather hair at the crown or side. For two braids (pigtails), part the hair down the middle to get two even halves. Clip or tie one half out of the way if you’re doing two. Then take a triangular or top section from the working side (about 3–4 inches wide at the front) and split that into three equal strands.
-
Begin the braid. To start, cross the left strand under the middle strand. (This underhand pass is what makes it Dutch instead of French.) Now take the right strand and pass it under the new middle strand. At this point you have made one “stitch” of the braid – it should look like a basic three-strand braid that lies on the scalp.
-
Add hair on the left. Now you will start adding small pieces of the loose hair into the braid. Using your comb or fingers, pick up a little hair from the left side of the head and attach it to the left strand. Then cross that left strand (now slightly thicker) under the middle strand again. This step tucks more hair into the braid.
-
Add hair on the right. Repeat on the right: pick up a small section from the right side of the head and add it into the right strand. Then cross that right strand under the middle. Now both added pieces have been incorporated.
-
Continue down the head. Keep braiding in this way, alternating sides: add a bit of loose hair to the left strand and cross under, then add some hair to the right strand and cross under. Each time you do this, the braid will move a little further down toward the nape. Try to keep your braid close to the head and in a straight line. Make sure each new section you add is even in size so the braid looks uniform. Keep the tension firm – pulling each strand snug under the middle.
-
Finish the braid. Once you have no more loose hair to add (usually at the nape of the neck), simply finish with a regular 3-strand braid. That means cross left under middle, then right under, without adding extra hair. Braid to the ends of the hair, then secure with an elastic. Smooth any stray hairs or make the braid even by gently tugging (see Tips below).
-
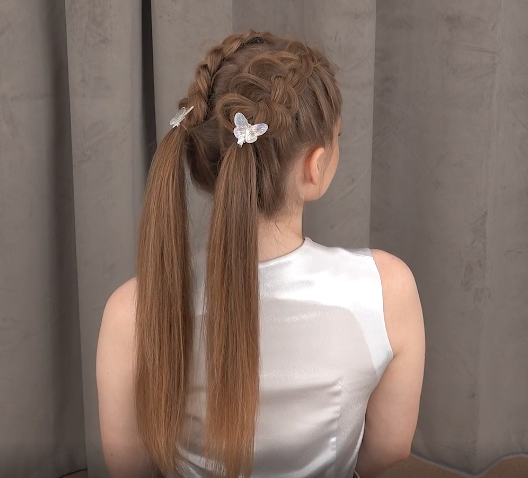
Repeat on the other side (if needed). If you’re making two Dutch braids, repeat all the same steps on the other side of the head. Try to keep the second braid symmetrical to the first by matching where you grab and cross the strands. When both braids are done, you’ll have a neat, sporty style.
Tips for a Neat Braid
-
Brush and section well. Smooth, tangle-free hair is easiest to braid. Before braiding, comb through the sections you will add so they glide smoothly.
-
Keep strands tight. As you braid, maintain gentle tension on each section. A tight braid holds together better. (A good trick: hold two strands tight as you pick up hair with the third.) However, don’t pull painfully hard – it should feel snug but not uncomfortable.
-
Even sections. Try to grab similar amounts of hair each time you add to a strand. Unequal sections will make the braid lopsided. Using a comb to section can help keep them even.
-
Watch your pattern. Always cross under the center. Accidentally crossing over will turn it into a French braid (which lies flat) instead of a raised Dutch braid. Keep reminding yourself “left under, right under.”
-
Pancake for volume. When the braid is done and tied off, you can make it look fuller by gently pulling the edges outward a little. First slide the elastic down about 1 inch, then spread the braid’s sides with your fingers. This “pancakes” the braid, giving it a thicker, more even appearance. If you like a polished look, a light mist of hairspray can keep stray hairs in place.
-
Use extra products if needed. A bit of smoothing spray or lotion on the top of the head can keep wisps from flying out. For very silky or slippery hair, a small amount of dry shampoo or texture spray helps the braid hold better.
Common Mistakes to Avoid
-
Loose braid: Not pulling the strands tightly enough makes gaps or a messy look. If your braid is sagging, try tightening each crossover as you go.
-
Uneven sections: Grabbing uneven amounts of hair will give a bumpy braid. Check that each section is similar in size before crossing under.
-
Wrong crossing: Mixing up the underhand versus overhand weave is common at first. Remember, Dutch = under! If part of the braid looks flat, you probably crossed the wrong way.
-
Skipping hair: If you forget to add a piece on one side, the braid will look like a plain three-strand braid from that point down. Always add some hair before each under-cross.
-
Not finishing: Stop braiding only once you have tied off the end. Leaving extra hair unbraided can cause the top braid to loosen later.
Practice and Encouragement
-
Be patient and keep trying. Dutch braids can feel backward to French braid pros. As one stylist says, “If you don’t get the hang of Dutch braids the first time, it’s OK! It’s basically the opposite of how you do a French braid”. Everyone needs a few tries. In fact, the blogger Laura Gummerman notes she “had to do several practice rounds in the beginning before it started to look right” but was glad she kept practicing. Remind kids (or yourself) that practice leads to improvement!
-
Practice on someone (or a doll). Many learners find it easier to start braiding on someone else’s hair. As that guide notes, practicing on a friend or mannequin head helps you see the braid pattern and get comfortable moving your hands. Take turns – help your child braid a friend’s hair, or ask someone to braid your hair while you watch. You’ll learn the motions faster when you can see every angle.
-
Slow down at first. There’s no rush. Go step-by-step until your hands remember the sequence. Saying it out loud (“left under, right under”) or counting “one, two” each cross can help beginners keep track.
-
Enjoy the results! Dutch braids are not only pretty and sporty, they’re practical. They hold hair off the face for sports or school and stay neat all day. An extra bonus: after you wear Dutch braids and take them out, your hair will have nice loose waves! That way you get two hairstyles in one.
No one masters Dutch braiding overnight. With each try, you’ll get smoother and faster. Use a mirror, get comfortable, and give lots of praise (“Great job!”) as you learn. Soon you (or your child) will be proudly rocking this fun, elevated braid style.
Sources: Easy braid tutorials and hairstyling guides were used to gather the steps and tips above. Each step explained here is based on those professional and community-sourced braid instructions, adapted for clear understanding.